
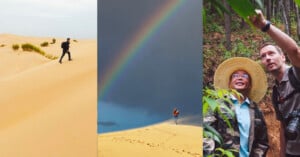
Vision: The Most Important Skill in Photo Editing
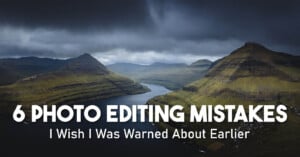
I don’t know about you, but even though I’ve been photographing for almost fifteen years now, sometimes I feel stuck when deciding which editing direction to take with some of my images.
I don’t know about you, but even though I’ve been photographing for almost fifteen years now, sometimes I feel stuck when deciding which editing direction to take with some of my images.
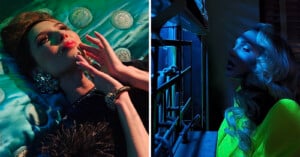
Los Angeles-based designer, creative director, and photographer Marilyn Hue has wooed big clients and generated a large online following thanks to her unique style and creativity.
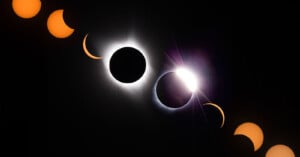
For those who may have somehow missed it, a historic total solar eclipse will be visible across much of North America on April 8. Photographing an eclipse can be tricky, but fret not. You'll surely capture some great photos next week with these helpful tips.
The sky is a key element in landscape photography, as it can create mood and depth in your images. However, many beginners tend to overprocess the sky, making it look unnatural and fake.
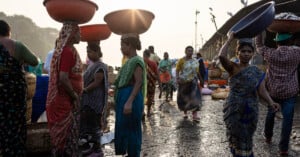
Shooting the busiest scenes we encounter while traveling in Asia can be very challenging. After 15 years of running photography tours and teaching in the area, I know that busy markets and streets can either be a photography heaven or a nightmare.
Standing on top of the desolate mountain, 4000 meters (13,000 feet) up on the Tibetan Plateau, our bodies were freezing and our batteries were dying but we needed to get the final shot for the documentary. Nearby, the thermometer read -20 degrees C (-4 degrees Fahrenheit), but the harsh wind chill made it feel much much lower.
A few months ago I headed to Iceland to check out some of the beautiful scenery the country has to offer, which, as many of you who have visited or are following Icelandic photographers on social media will attest to, is a considerable amount.
Some of the coolest pro camera features on iPhones are hidden by Apple and turned off. Want to shoot like a pro? You need to go into Settings and turn these bad boys on right now!

Photography is unique, as far as artistic media is concerned. Behind the camera, we can freeze time, turning once-in-a-lifetime moments into indelible mementos that have a good chance of outliving the gear that created them.
Wedding photography is a fast-paced high-stakes environment, kind of like football or poker, except without all the hitting or sunglasses and hats. It’s actually really hard to shoot with sunglasses on and tackling would damage our gear so try to avoid that too. Luckily, after over a decade of photographing weddings, I’ve picked up a few survival tips that might just help you get through your first wedding season unscathed.

Do your photos suck? Feeling discouraged by your photography lately? Not making the progress you expected? The good news is, it’s completely normal — all photographers grow at different rates and hit speed bumps along the way.

It’s fascinating to look back over my 10+ years as a wedding photographer and see the evolution the industry has gone through. That’s not to mention all the drastic changes that happened before my time. It makes one wonder what it will be like to be a wedding photographer in the future.

My name is Simon Wiffen, and I'm a Leeds, UK-based photographer specializing in family, lifestyle, portrait, commercial, and event photography. In this article, I'll share my 6 best tips for better event photography to help you achieve the best results.

Between 2008 and late 2016, I took tens of thousands of pictures and proudly vomited the vast majority of them online. While I’d toyed around with things like depth of field and long exposures, I didn’t understand anything about photography, so my camera rarely left ‘auto’. I’d checked out an online tutorial or two, but as far as I was concerned, ‘exposure compensation’ was something victims got after winning a public indecency lawsuit.

When you look at your wedding photos, do they tell a story both individually and collectively? Can you feel like you’re back in that moment? Does the image help you remember not only what it looked like but how it felt?

Creating your first contract as a wedding photographer? My first tip is to hire a law professional to review your contract. While over a decade of experience in the wedding industry allows me to give you some tips based on my experience, a wedding photography contract is a legal document between you and your clients that outlines expectations, responsibilities, and deliverables.
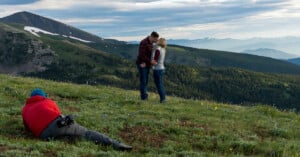
Outdoor engagement photography is one of my favorite aspects of being a wedding photographer. I get to shoot environmental portraits in beautiful places without the constraints of a wedding day. Additionally, I get to spend time with my couple getting to know them and their interests in a low-pressure environment.
Landscape photographer Michael Shainblum is extremely experienced across a diverse range of landscape photo subgenres, including woodland, seascape, and abstract landscape photography. Among Shainblum's favorite landscape photography genres is waterfall photography, the subject of his latest tutorial.
The phrase "shooting a moving target" certainly has more than one connotation, especially coming from an ex-military combat photographer. While I’ll be using examples from my time in the U.S. Air Force, we are specifically talking about photography. I’ll be sharing my top 6 action photography tips for run and gun photographers.
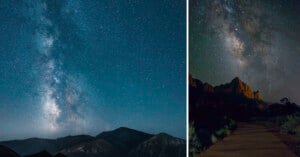
Photographers wanting to capture beautiful Milky Way photos need the right plans, the appropriate gear, and some basic knowledge of optimal camera settings.
Expert wildlife photographer Steve Perry of Backcountry Gallery showcases the power of camera height in a new educational video. One of the most powerful and effective ways to change a wildlife photo's story is by shooting from different heights relative to the subject.

Have you Googled “headshot photographers" lately? The results are pretty eye-opening. Right before I sat down to write this, my Google search resulted in 4 sponsored ads, right at the top, for AI headshot generators. If that doesn’t concern you, it should.
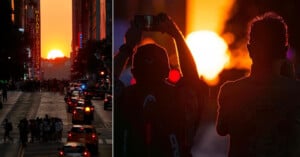
Twice each year, the setting Sun aligns perfectly with Manhattan's street grid, illuminating the north and south sides of every cross street on the island. The event, called "Manhattanhenge," delivers beautiful vibrant colors and, unsurprisingly, is a major draw to locals and tourists alike in New York City.
People, they’re literally everywhere. At least that’s how it feels when you live in a country as densely populated as Japan. For the longest time, I was incredibly fussy about having people in my frame.

As we all know, there are many things that can make or break a photograph. While technical aspects might immediately jump to mind and the light may grab our attention, one word that tends to pop up a lot in my feedback is “intent”.

The American Southwest is an enchanting realm brimming with extraordinary shapes, mesmerizing textures, and captivating patterns. Amidst a symphony of vibrant colors and diverse textures, capturing the essence of such a place can initially feel overwhelming.

We all want people to like and enjoy our images. Social media is plastered with countless pictures whose owners are all seeking attention and some kind of approval from others.

Like many photographers, we used to be more “jack of all trades” when it came to shooting professionally. We’d shoot a wedding one day and a product shoot the next.
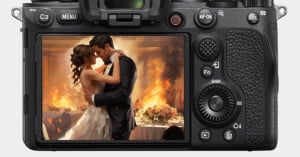
Using flash in your wedding photography can take your work to the next level. It can look more professional and dynamic. Additionally, there are a variety of scenarios when flash makes certain things possible that wouldn’t be if you’re relying on natural light.
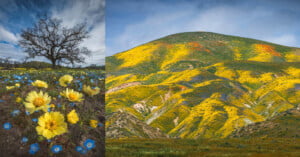
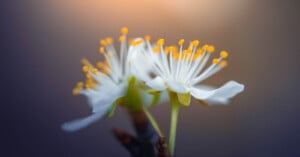
Capturing wildflowers can be an incredibly enriching experience that allows you to immerse yourself in the vibrant colors, delicate petals, and the intoxicating scent of nature in full bloom.
Voting with your wallet means buying products you believe in, supporting companies you want to see more of as well as products/practices you approve of. Buying one brand over another, buying locally rather than from a chain, or choosing not to buy from a certain industry at all would all be examples of voting with your wallet.
Amazingly, in the age of AI image creation, film photography is not only popular but it's growing again after an initial decline. More and more, people are finding value in timeless, handcrafted imagery.

I recently wrote a pair of pieces about giving and responding to critiques of photography with a certain level of decorum. As many of you already know, criticism is best given when actually asked for.
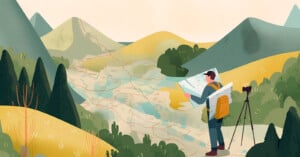
When I first started doing landscape photography, visiting new locations used to intimidate me a lot. I think part of me would feel the anxiety and pressure of needing to get a good shot, and oftentimes, I would not use the proper tools to set myself up for success.
Just like most things in life, success can depend on location, location, location. I know that I’m coming from a state where there are a lot of beautiful backdrops so I’ll do my best to give tips that will apply to you wherever you happen to be. I’ve shot sessions in a variety of locations and while I have my locations and preferences, of course, I think it’s possible to make the best of whatever you have to work with.

I've been doing some freelance web development and photography and I was recently contacted by an acquaintance who's looking to start her own real estate office.
Syrp Lab has released a new video to help videographers capture mouth-watering food footage, although the tips and tricks also apply to still photography.
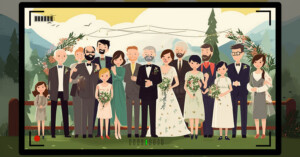
Family and bridal party pictures at a wedding are important, every couple wants them but none of their families want to be patient and present to take them. Meanwhile, there’s a lot of pressure from mothers and grandmothers to get all the important combinations while at the same time, there’s always a cousin that disappeared to the bar.
I love spring. Little flowers pop up everywhere -- in your garden, in nature, in parks, next to the roads: basically everywhere. And these flowers are great fun to photograph.

Abstract landscape photography offers a unique opportunity to explore the world around us in a completely different way. By focusing on patterns, shapes, and textures, we can discover unseen worlds in even the most mundane places.