
Australian Portrait Prize to Allow AI Entries, ‘Art is Not Stagnant’
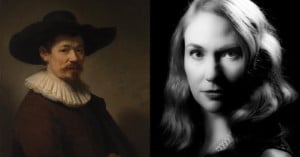
A portrait competition in Australia that is open to photographers and artists will allow AI images to enter this year.
A portrait competition in Australia that is open to photographers and artists will allow AI images to enter this year.
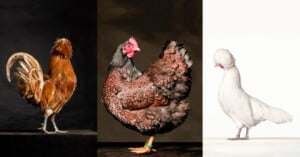
A photographer who has taken studio portraits of chickens for the last eight years says he is "captivated" by them.

Posing with her daughter who leans on her shoulder, a Victorian mother stares mournfully into the camera. But her cheerless expression is understandable when you realize that her peaceful daughter beside her is dead.

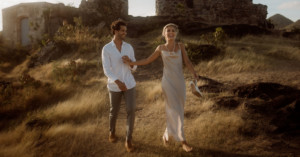
Outdoor engagement photography is one of my favorite aspects of being a wedding photographer. I get to shoot environmental portraits in beautiful places without the constraints of a wedding day. Additionally, I get to spend time with my couple getting to know them and their interests in a low-pressure environment.

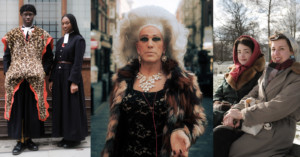
A photographer traveled to California to meet some of the weird and wonderful people who call the Golden State home.

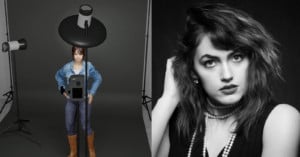
Have you Googled “headshot photographers" lately? The results are pretty eye-opening. Right before I sat down to write this, my Google search resulted in 4 sponsored ads, right at the top, for AI headshot generators. If that doesn’t concern you, it should.

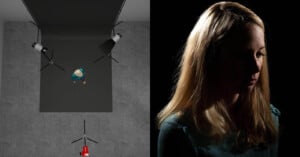
A photographer has been praised online for not forcing young girls to smile when they are having their picture taken.
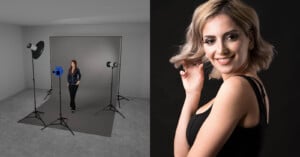
If you shoot headshots and/or portraits, clamshell lighting is something you should definitely become familiar with. This versatile and easy-to-create lighting setup produces a very flattering look useful for a variety of portrait situations.

The National Portrait Gallery in Australia has announced the winners of its annual National Photographic Portrait Prize competition. Photographer Shea Kirk has taken home the top prize, including a $30,000 cash prize and $20,000 worth of Canon equipment, courtesy of Canon Australia.
In this article, we are going to take a look at rim lighting. As you might guess, rim lighting is used to light a portion of the edge of your subject. While it is most often used as part of a multi-light setup, it can be used on its own for dramatic effect.

A photographer has achieved the seemingly impossible task of photographing a person in all 50 American states in a single day.

Delightful and full of exuberant whimsy, photographer Jared Schoenemann’s series Anthropromophism, is a charming spectacle of stuffed animals bustling with playful souls.
Loop lighting is a very common style of portrait lighting that is seen very often in portrait photography. In fact, if you’ve spent much time at all shooting in a studio, you’ve probably employed loop lighting without specifically trying to.

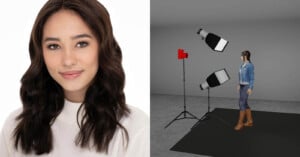
Headshot photography is an exciting and lucrative niche in the photography industry, and if you're looking to make a name for yourself as a headshot photographer, this article is for you.

Great portrait photography is so much more than just about knowing how to work a camera. You can memorize your camera’s entire manual and still not be confident in a portrait shoot because most portraits require posing. Luckily, this is the right place to learn how to pose and become a better portrait photographer.

We all know that headshot photography is all about capturing the essence of our subjects - their personality, character, and unique qualities that make them stand out. As headshot photographers, how do we really capture that magic?
Butterfly lighting has long been a “go-to” setup for fashion close-ups as well as other portraits where one wants to emphasize cheekbones and frame the face in shadows from below the chin.

Portrait photography is about capturing the personality or identity of your subject. Therefore, these photography tips for portraits will unsurprisingly relate to the person you are photographing. How do you make them look their best, feel more comfortable, or even tell a story about them through your portrait?
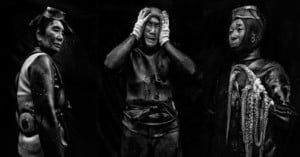
A photographer captured the portraits of South Korea's legendary "Grandma Divers," elderly women who freedive deep into the ocean for seafood.
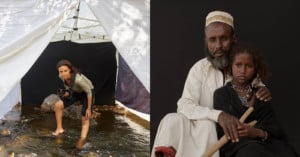
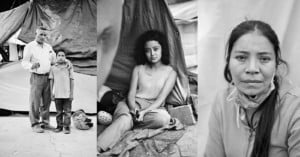
This nomadic portrait studio tent was our world for many years. Step inside and I will show you a world of beauty, adventure... and even heartbreak.

It’s a beautiful, sunny day. You’re celebrating a special event with a photo session, getting your poses ready. You’ve posed countless times with family and friends, at parties, and for selfies. This should be a piece of cake, right? You say ‘cheese’ in your head and bring out the pearly whites. Then you check the camera to see the result.

Most professional portrait photographers exclusively use strobes for a variety of reasons, but commercial photographer and director Isaac Alvarez explains that in some circumstances, there are still reasons to use constant lights.

We live in a world where everyone has access to a camera in some form or another, and the content we create is often viewed through a phone screen. So it's no surprise that so many people have learned how to take and edit cool photos that will get them likes on Instagram.
Photographers who shoot portraits are likely familiar with Rembrandt-style lighting as well as other styles such as loop, butterfly, and so on. This is especially true if you have taken a lighting class or have been reading up on the subject. You may be using this specific type of portrait lighting in previous images and might not even realize it until reviewing later. (Ask me how I know).
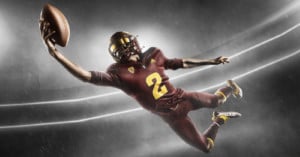
Photographing football campaigns in one of the most aggressive and intense types of commercial photography there is. While some photoshoots will have a sushi chef for craft services, football sets have doughnuts, caffeine and loud music. Football is unlike any other sport to capture, and I absolutely love it.

Much to the surprise of many, photographing athletes doesn’t always mean you are a sports photographer. Truthfully, I don’t know much about sports at all.

Westcott recently released its third version of the popular specialist tool, the Eyelighter. If you happen to be a working headshot or portrait photographer, there is no way you haven’t seen it, thought about buying it, or even had it in your shopping cart at some point.

Philippe Halsman was born in Riga, Latvia, on May 2, 1906. He discovered an old view camera in the family attic when he was fifteen, bought some glass plates, and started making photographs. Like many other photographers, when he first saw that image appearing in the darkroom tray, it was a life-changing moment, and he knew what he was going to be doing with his life.

Portrait photographers use a myriad of different lights and lighting styles to achieve the results they desire. I’ve seen great portraits done with 10 lights, and even greater portraits done with a single light. The best photographers can do both and play around with lights like tools in their toolbox to create something unique.

Perhaps you’ve been through this scenario. You see an interesting subject doing something truly unique, you hesitate and sometimes miss the shot altogether. When you do gather enough courage, your heart races, your palms get sweaty, and a quiver can be heard in your voice as you nervously ask if you can take a person’s picture. Sounds familiar? It can be discouraging if you miss the opportunity and the shot.

We've all heard of the classic rule of thirds, leading lines, and other composition techniques. But going with the most common rules can get a bit boring at times.
Photographers are tasked with making their subjects feel relaxed for great-looking shots, and one Canadian photographer has a novel approach to her work: asking her clients to pretend to be drunk.

All About Photo has announced the winners of its 2022 competition that recognizes the best single images from photographers around the world.

Mother’s Day is about a few things: flowers, lunch or dinner together, and of course, family photo time, a good opportunity to update the archive with images of us all together again.
A photographer captured a stranger’s portrait every day for an entire year after his work as a director dried up because of the Covid-19 pandemic.
The Sony World Photography Awards 2022 has announced this year's winners that span numerous categories. Photographer Adam Ferguson was honored with the Photographer of the Year title for his unique Mexican migrant self-portrait project.
Photographer Donal Boyd has a mission to conserve nature through visual advocacy. In this case, his photos of Iceland's symbol of culture and heritage explore the connection between nature and humanity of his home country through portraiture.
For many years I’ve played with the idea of recreating various lighting looks that many of us may know and love from the natural world around us.
Portraits of sitting subjects can make up a big portion of a gallery, particularly for those who shoot indoors. To help avoid shooting unflattering poses, photographer and educator Jessica Whitaker has shared her best tips on how to capture seated women looking their best.
Photographer Geo Leon is known for his easily-recognizable portrait photography style full of detail and vibrancy and has shared an insight on what drives his creativity.