
Make a DIY Diffuser Using a Paper Towel Roll and Some Aluminum Foil
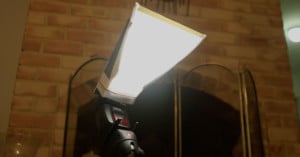
Flickr user Twin-Reverb made this nifty DIY flash diffuser using a cardboard paper towel tube, a paper towel, and some aluminum foil.
Flickr user Twin-Reverb made this nifty DIY flash diffuser using a cardboard paper towel tube, a paper towel, and some aluminum foil.
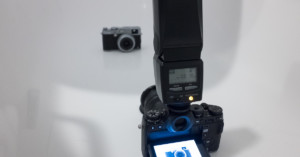
When it comes to macro photography, DIY solutions for would-be macro shooters looking to get better results without emptying their wallets abound—from reverse lensing, to DIY macro tubes, to full-blown light boxes. Today, we'll add to that list by showing you how to make a simple DIY flash diffuser.
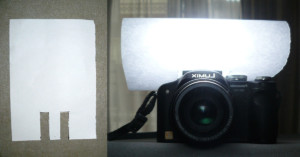
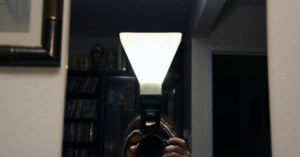
If you ever need to soften your flash in a pinch, you can go the MacGyver route and fashion a diffuser for yourself using an ordinary piece of paper. They usually cost about $0.01 per sheet, so this is one of the cheapest diffusers you can make.
As long as I can remember, I’ve been fascinated with the small and wondrous world of macro imaging, predominantly as a macro videographer, but also in the stills realm as of late.
One thing that is a constant in any form of creative imaging is the need to constantly update, modify and adapt the base equipment we are dealt when we make our already-expensive gear purchases. Recently, I've been focusing my attention on adapting photographic flash guns for macro photography.

Sometimes we’re left working with inconsistent or otherwise less-than-ideal light sources. And while we can’t always make bad light good, we can certainly control some of the light quality if we get creative. Showing just how to do that is this clever little DIY Diffusion tip by the guys over at Film Riot.
We wouldn't exactly describe it as 'elegant,' but this little DIY project by Instructables user pizzidave is both functional and extremely easy to make. Requiring almost no DIY 'skill' of any kind, you can create a cool background and grid diffuser for yourself using some plastic bottles and rubber bands.
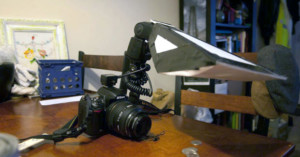
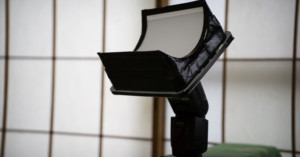
Here's a step-by-step tutorial on how you can make a pretty nice flash diffuser for your macro setup for just a little time and a little money.
Flickr user boingr came up with a great idea for those of us …
Photographer Joseph Nienstedt was at a grocery store recently when he spotted a …
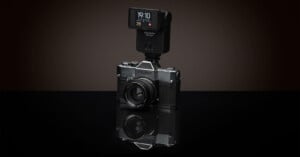
Finnish photographer Petri Damstén crafted a digital clock within a flash unit using a Raspberry Pi Pico, and it looks like a delightful accessory that many photographers would pay good money for.
As we know, wide angle lenses show a larger field of view and therefore make things appear smaller and further away than they are. Which contradicts the concept of macro photography, where we want our subject to be projected onto the sensor at a magnification ratio of at least 1.0x. So how can we combine a wide angle perspective and macro macro-capabilities?
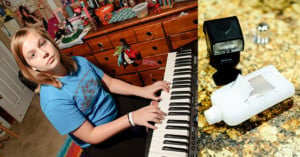
Light macro photographs can be tricky. If you are a beginning macro photographer and do not know where to start when it comes to using a speedlight to illuminate your subjects, here is a complete guide to different flash diffusers you can use for macro photos.
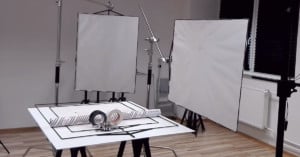
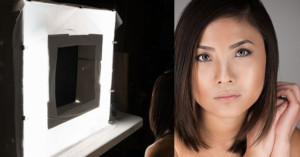
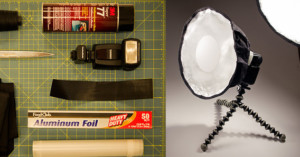
Light diffusion panels can cost $80 to $100 or more when purchased retailed, but very little when you make them yourself, and to do so is very simple. I can’t tell you how many times I have been asked about my diffusion panels and where I get them from. The ones I use in my studio have all been custom-made to fit my needs, and I’ll show you just how to make your own.
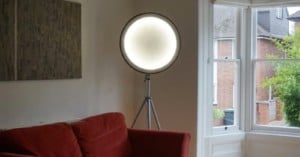
Need something fun to build this weekend? This step-by-step tutorial will show you how to turn an old bicycle wheel and some fabric into a simple DIY softbox that you can use for photography or, just as a cool studio accent light.
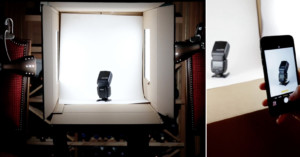
There are a ton of options out there for building your own product photography lightbox, but this is one of the simplest and most functional creations we've seen. For under $50, you can build it for yourself.
Need a home studio for some product photography? COOPH has some great ideas for you. In this inspirational little video, the magazine shows you how to build a DIY photography studio at home using mostly household items.
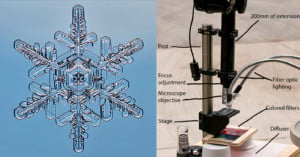
Looking for a great winter photography project? How about snowflakes? If you live in the Northern tier of states I promise you will have plenty of subjects to shoot.
The time had come. I’d been trying to justify keeping my X100S and X100T for some time but, in reality, since T had arrived, S had been spending increasingly lengthy spells in the cupboard. So, with a heavy heart, I decided to sell. The obvious route was on eBay, so I cleaned the camera up and took a couple of snaps before preparing my listing.
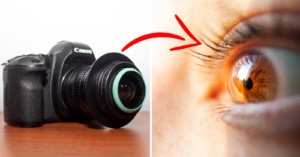
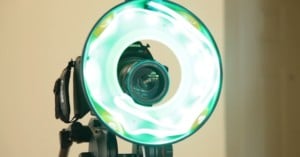
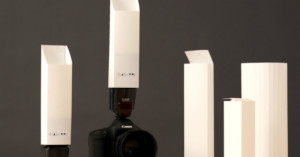
Photographers are familiar with the ring light, which produces a pleasing ring-shaped highlight (or “catchlight”) in a subject’s eyes. It’s often used in the fashion industry to create images you see in many magazines. The Square Ring Light is just like that — except it’s a square. I find it makes a unique, almost otherworldly catchlight that really draws attention to the eyes.
Want to play around with studio lighting from the comfort of your own home without dropping any money on …
Got $30, a frisbee and some free time this week? Need a ring light? If you answered yes to both of those questions, we've got a neat, quick and super simple DIY tutorial that's perfect for you.
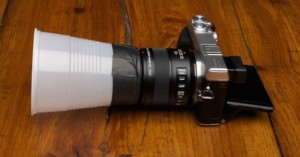
Hand-held macro photography presents a lot of challenges, but three of the most prevalent are: subject movement, camera shake, and harsh shadows. Fortunately, you don't have to carry around a bunch of gear to solve these issues. In fact, a cheap plastic cup will do the trick all by itself!
One of the most sought after lighting accessories is a ring light. Meant to create a unique aesthetic, a ring light is a great way to add a sharp, but direct light source to any image. The problem is, ring lights don't come cheap, and are rarely meant for smaller cameras.
Thankfully, there's now a DIY solution for you hands-on types. Thanks to Instructables user alpacalypse, you now have a step-by-step guide to creating a ring light for your typical point-and-shoot camera.
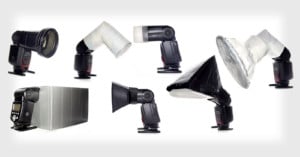
The magic of 3D printing has led to the creation of a few pretty cool DIY projects we've featured in the past. In the world of cameras, we've seen everything from lens adapters to flash diffusers make their way into the real world via the 3D printer and some plastic.
What we had never seen before now, however, was a fully operational 3D printed SLR camera, but freshly graduated design student Léo Marius has created just that!

3D printing is becoming cheaper and more accessible, so photographers no longer need to rely on camera gear manufacturers for simple plastic gear items such diffusers and other light modifiers. Eric Chu over at MAKE recently noticed a photo intern using a piece of paper as a cheap flash bounce. Seeing that the makeshift bounce didn't ever last more than a few days, Chu wanted to offer a better solution... so he decided to produce one himself.
Flash diffusers come in all shapes and sizes, from DIY Home Depot versions to more expensive professional grade equipment. None of these solutions seemed adequate for 30 year photography veteran Les Tirmenstein, however, and that's why he designed the FlashPipe.
Industrial design student Hunter Frerich came up with a simple and cheap DIY …
Here’s a quick and easy photo hack: cut a slice out of a white film canister to soften the …
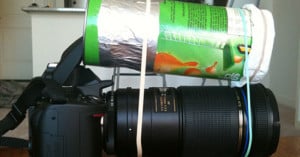
Flickr user Steve Kushnir came up with this neat idea of building a cheap DIY diffuser using a Pringles can, two layers of paper towels, and some rubber bands. He attached it to his Nikon D5000's popup flash and uses it for macro photographs of creepy crawlies.
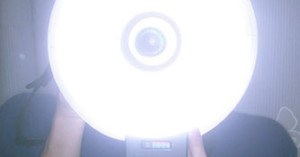
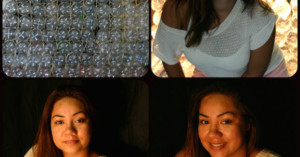
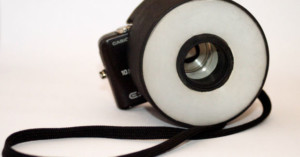
One of the things about macrophotography is that you either have to shoot wide open (and have a depth of field of about 1 micron or so) or stopped down to get some decent DOF (but have ridiculous shutter speeds making everything a blur). The solution: put a strobe on it! Given that you are so close to your subject, it's hard to properly light it. A ring flash is a good choice and at the tiny distance it is used from the subject, it has the effect of a large softbox creating even lighting.