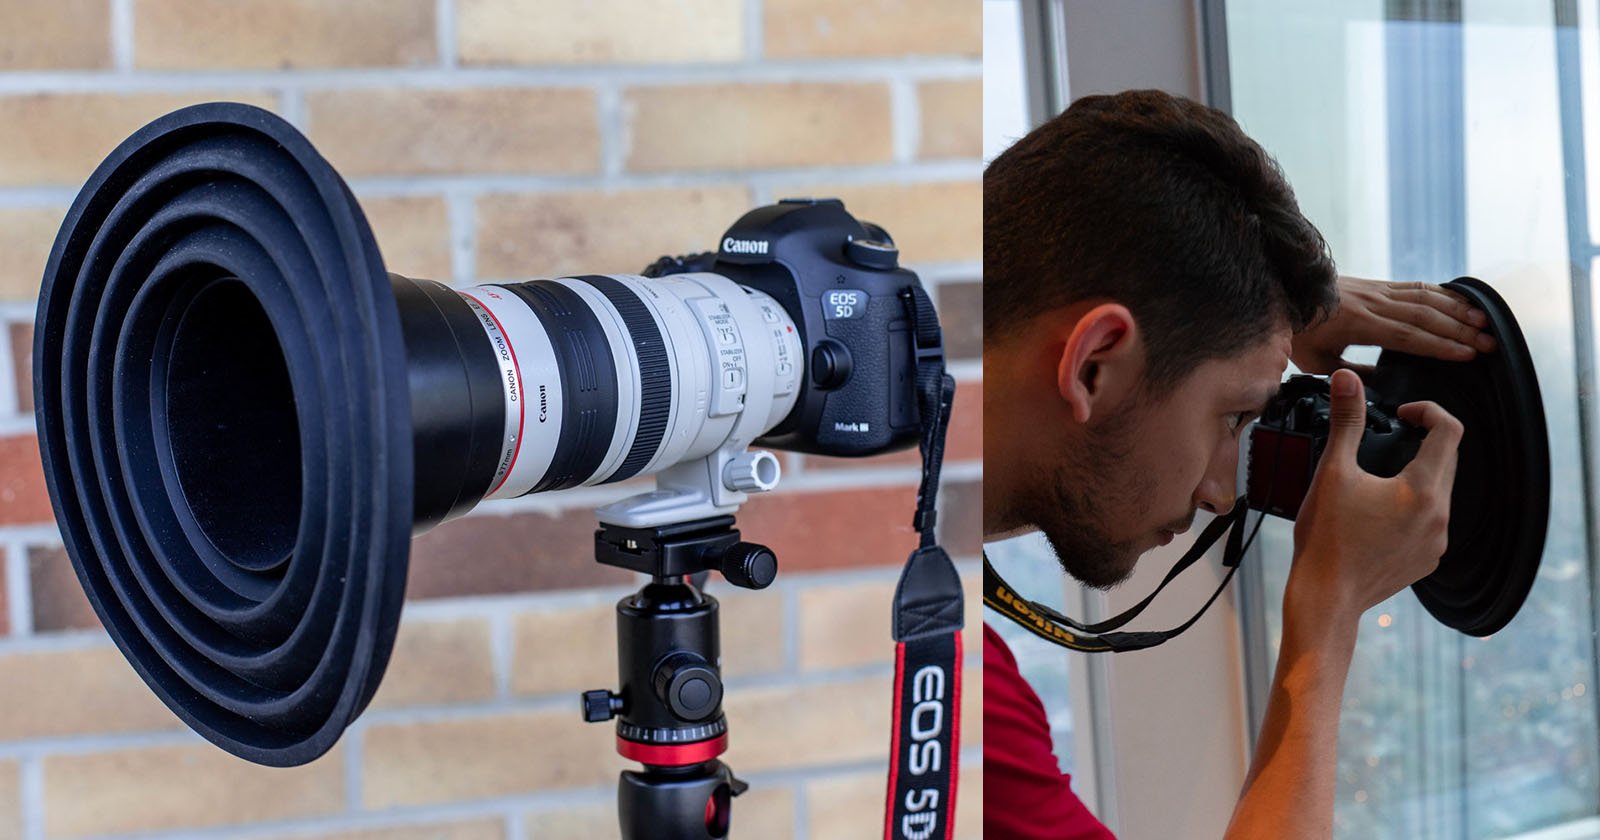
Flect is a Simple DIY Device for Shooting Reflection-less Photos Through Glass
Flect is a simple device I developed to take photos through glass without reflections or glare from the surrounding environment. Here’s a step-by-step tutorial on how to make one for yourself.
How It’s Used
First, here’s an introduction to how the device is used: Place the top two suction cups on the window as far apart as they will go and secure them in place:

Secure the bottom two suction cups near the middle of the device until it forms an upside-down trapezoid:
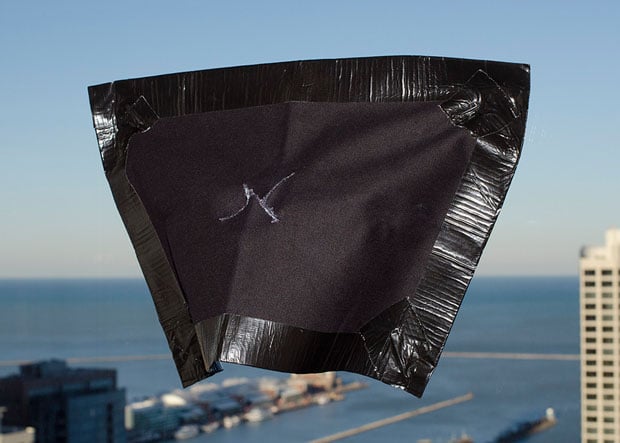
Stick the lens through the hole. With your free hand grip the lens to focus and compose the shot:
Making Your Own Flect
This 9-step tutorial will take about 30 minutes to complete once you have all your necessary items. It was designed to be easy to build with store-bought products and without any sewing.
Step 1
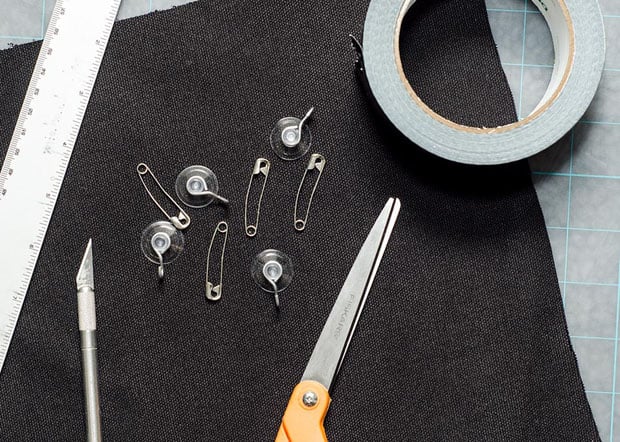
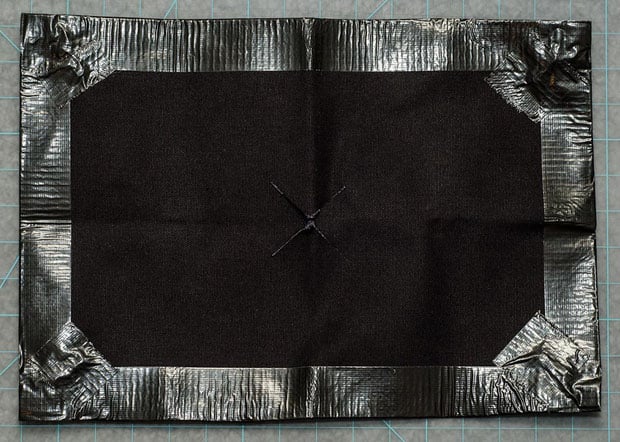
To complete this project, you’ll need: black canvas, shearing scissors, 4 small suction cups, 4 medium safety pins, duct, masking, or gaffers tape, a tool of measurement, an X-Acto knife, and a flat, fairly clean, surface.
Once all the materials are gathered, cut the fabric into a rectangle. Mine was cut at 16″x11″.
I wouldn’t cut much smaller than this, as you want to give yourself plenty of fabric to block the surrounding environment.
Step 2
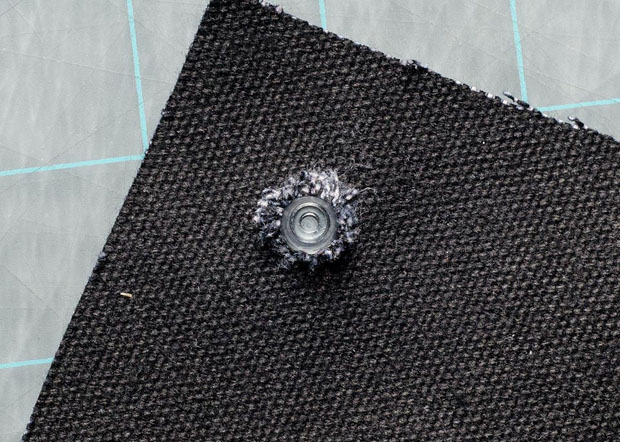
When the fabric is finally cut, you’ll want to take your X-Acto knife and poke a small hole in each corner of the fabric. The hole should be roughly 3/4 of an inch from either edge of the fabric.
After the hole is created, slide the nub of the suction cup through the hole.
I pretty much eye-balled this at the time of creating it and only measured when I was writing the instructions. Just make sure it’s not too close to the edge to avoid the potential of it getting ripped off the fabric upon removal from a window.
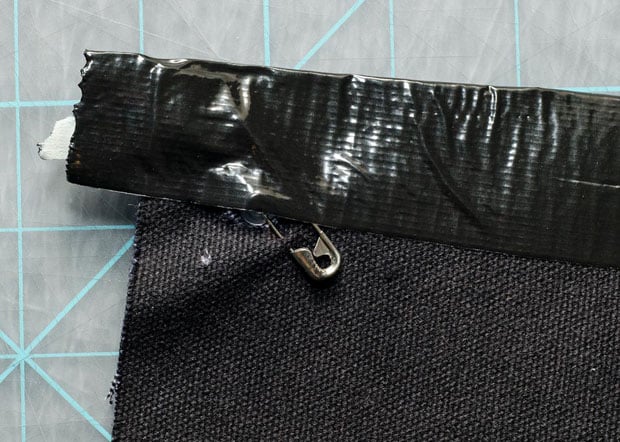
Step 3

A simple way of fastening the suctions cups to the fabric is with the use of a safety pin. To do this, weave the pin through the fabric, then the suction cup, then back through the fabric before closing the safety pin.
Make sure to grab as much of the fabric as possible. Doing so will help protect the suction cups upon removal from a window.
Disclaimer: I’m not responsible for any blood, tears, or foul language that may result in this step of the process.
Step 4
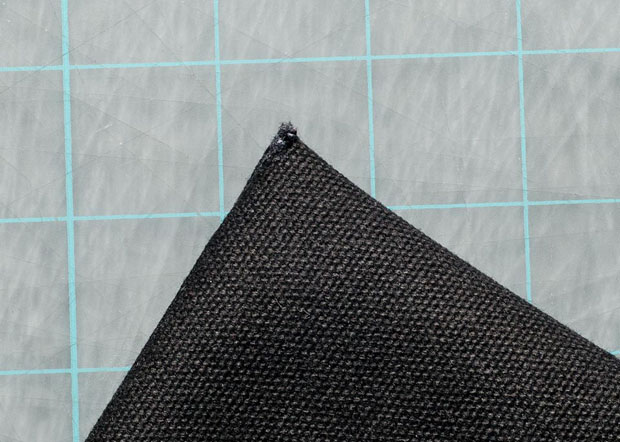
When all 4 corners have suction cups pinned to the fabric, fold the fabric into 4 quadrants. In doing this, you’ll be able to find the exact center of the fabric to make a small hole.
This hole will allow you to stick your lens through the opening to take photographs.
Step 5
You’ll want to measure the width of the lens before you begin cutting. You’ll want to make sure the opening will be big enough for your use.
Once you have the width, stick your scissors through the hole and cut an “X” into the fabric.
If you want to tape the edges of the cut, feel free to do so (I have not done this with mine). You’ll learn the method for this in the next steps.
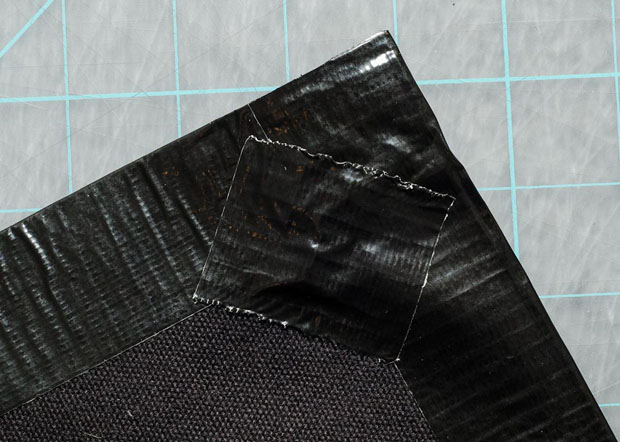
Step 6
Take a piece of tape long enough for one of the sides and lay half of it on the front and fold the other half to the back. Make sure you don’t cover the suction cups.
Run your finger along the tape on both sides to smooth out the surface. Use your X-Acto knife to cut the excess tape from the edges.
The first time I made this I used masking tape, for the tutorial I used duct tape. Feel free to use whatever tape you feel appropriate.
Step 7
Apply tape to all sides and make sure to cut off the extra tape from the edges. Depending on how wide your tape is, you’ll mostly cover the safety pins.
Take a little extra tape and cover the edges.
Step 8
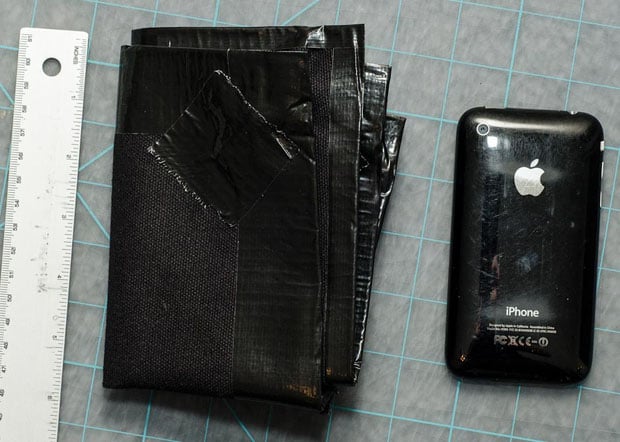
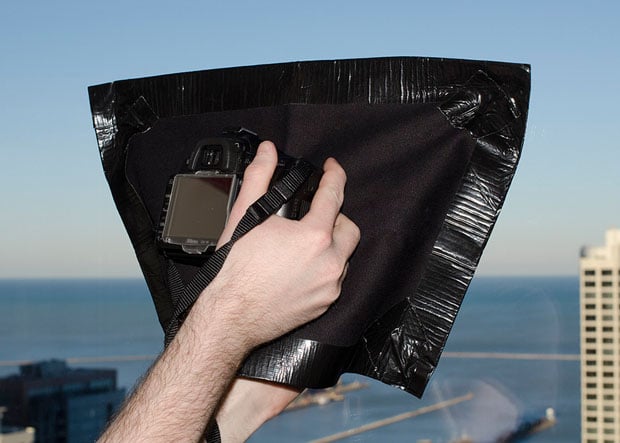
The final product should be small enough to fit easily into your camera bag, back pocket, coat, or whatever else you carry with you when you are taking photos.
Step 9
That’s it! You’re done! Depending on which tape you use, the overall product may be a little stiff. Fold, bend, and manipulate the fabric a bit to loosen it up.
Examples and Tips
Here are a few easy tips to remember when taking photographs through glass. There is one situation where Flect is not 100% effective and it is mentioned below.
Before and After Comparison
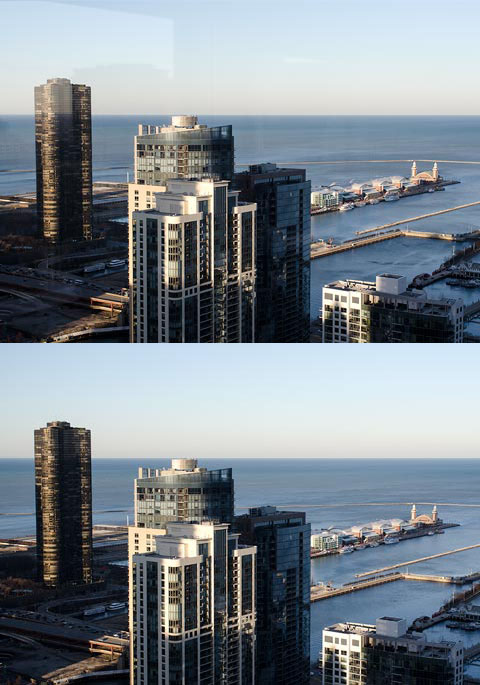
Tip #1: Here’s a side-by-side comparison. Download the full-res before and the full-res after shots to really understand how much reflection is being eliminated.
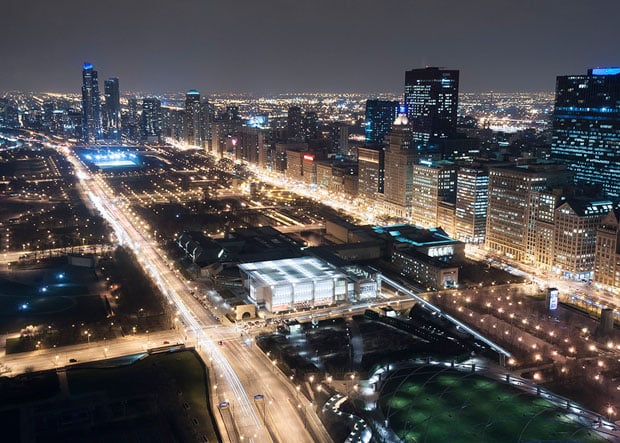
Tip #2: This photo was taken at a slight angle and the reflections were eliminated. Pay attention to Tip #7 when shooting at extreme angles.
Example 1

Tip #3: If you are taking photos from a moving vehicle, objects closer to the camera will have a bit of motion blur. You can fix this by shooting with a faster shutter speed or by shooting scenes farther away.
Tip #4: A wide lens and a dirty window could create difficult shooting situations. I was able to avoid this problem with this photo by shooting with a 35mm lens on a cropped-sensor body.
Tip #5: Almost all of my shots are made with small prime lenses. Shooting with a giant zoom lens may involve a bit more work.
Example 2
Tip #6: Originally designed for hand-held use, Flect works just as well with a tripod.
Tip #7: This works better when not shooting at an extreme angle. The above photo and this photo were both taken from the same spot, but the more parallel you get to the glass, the less effective it becomes. (If you are concerned about this, you can try using a larger cut of fabric. I have not tested this though.)