Shooting High-Resolution Macro Photos of Snowflakes
Winter can be a dull season for macro photographers. Many of the usual subjects are desolate, lifeless or invisible. However, there is one subject that’s often in abundance outdoors (depending on where you live): snowflakes. There have been many strategies for photographing these ice crystals over the past century, but the simple stage of an old mitten is ideal.

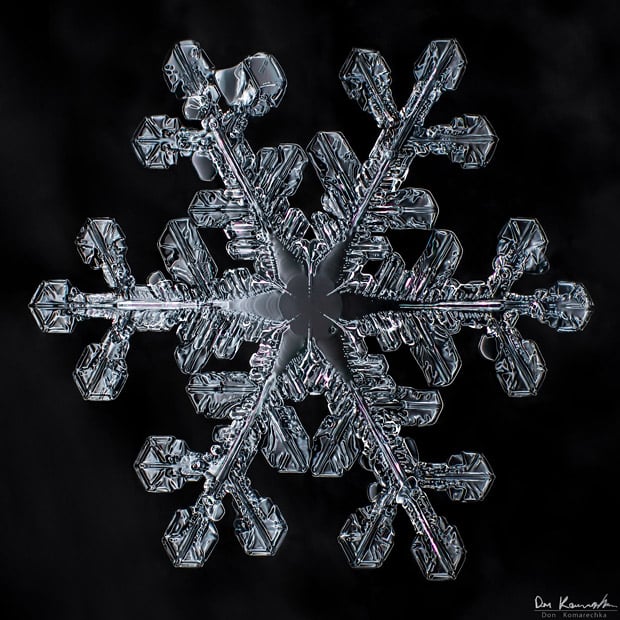
Snowflakes offer a great diversity in size, shape and even color. The smallest I’ve photographed measure 0.4mm, requiring significant magnification beyond the 1:1 life size that most macro lenses offer. Larger specimens nearing 1cm (0.4in) may be more approachable. You’ll also need a ring flash and some freshly falling snow.
The lens used in these images is the Canon MP-E 65mm f/2.8 1-5X macro lens. On its own, it is capable of reaching 5:1 magnification and with a standard set of extension tubes around 6:1.
Don’t rush out and buy one just yet: you can use a combination of close-up filters, extension tubes and reverse-mounted lenses to increase the magnification you have right now. The closer the better!
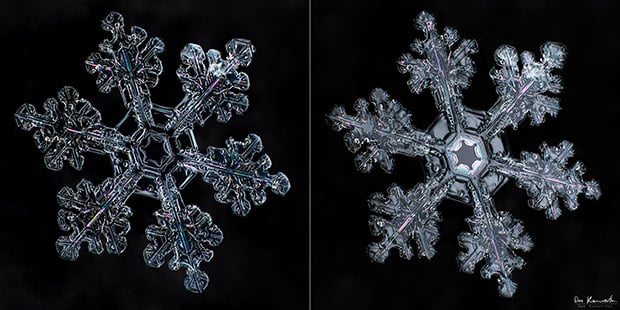
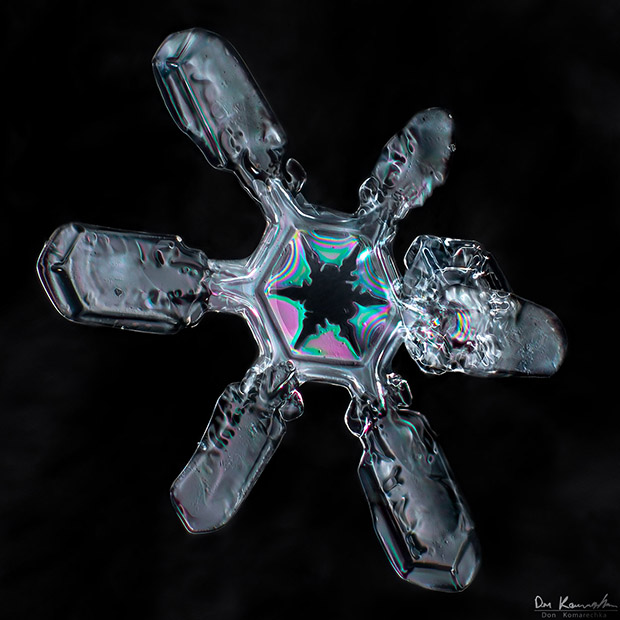
I use a ring flash for all of my images, as it provides a simple light source that can be positioned at the perfect angle to generate surface reflection. I typically set the flash bank ratio to 6:1 (one side of the flash is much brighter than the other), giving most of the light to the reflective side. Careful angling of the camera and rotation of the flash will get the light perfectly reflecting back, making the surface of the snowflake shine.
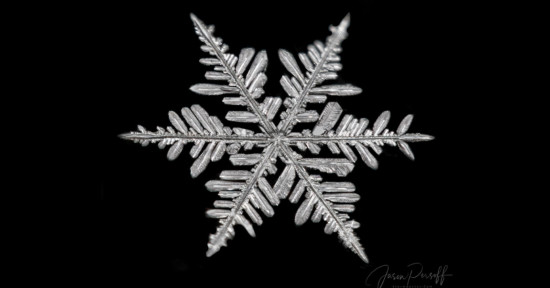
Adjusting your flash even by a few degrees can light the edges instead, allowing for a completely different view of the same snowflake. Practice and experimentation is key here, and you’ll likely see the left image far more often that the right one:
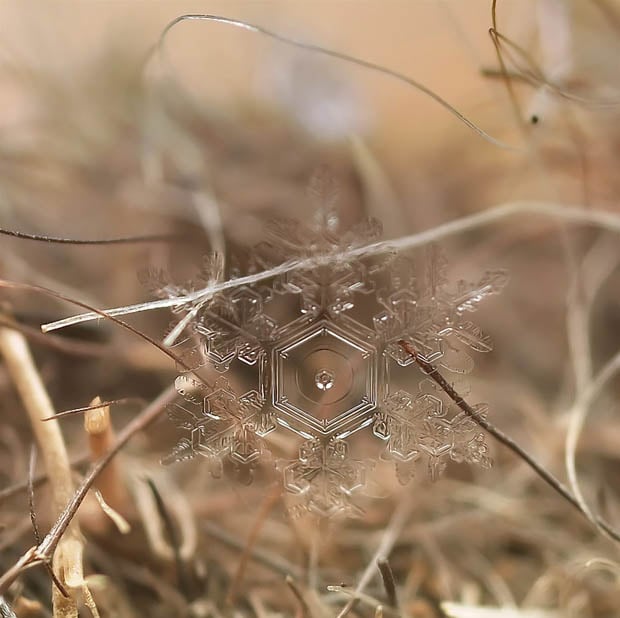
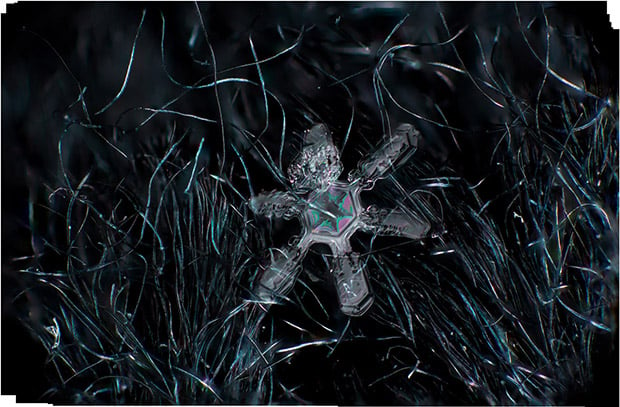
The next piece of equipment needed is an old mitten. Any woolen winter garment (e.g. hat, scarf) will work and the color you choose will become your background. All of my snowflakes are photographed on the same black mitten given to me a number of years ago (thanks grandma!).
Place the mitten outside where the snow can fall on it, and wait. You’ll now spend your spare time studying weather charts to discover when the best snow is going to hit your target.
The snow falling needs to be as fresh as possible. Even after an hour, melting and sublimation (the snowflake essentially begins evaporating) begin to destroy your subject. Blowing wind will also make the snowflakes difficult to photograph and will often break them before they can be photographed.
The best conditions to look for are little wind, light snowfall and cold temperatures (around -10°C/14°F works nicely). Snow will appear quite different at different temperatures, but the biggest snowflakes form around this temperature. -15°C/5°F creates the biggest crystals, but that temperature is in the clouds – not on the ground – and can be difficult to pinpoint.
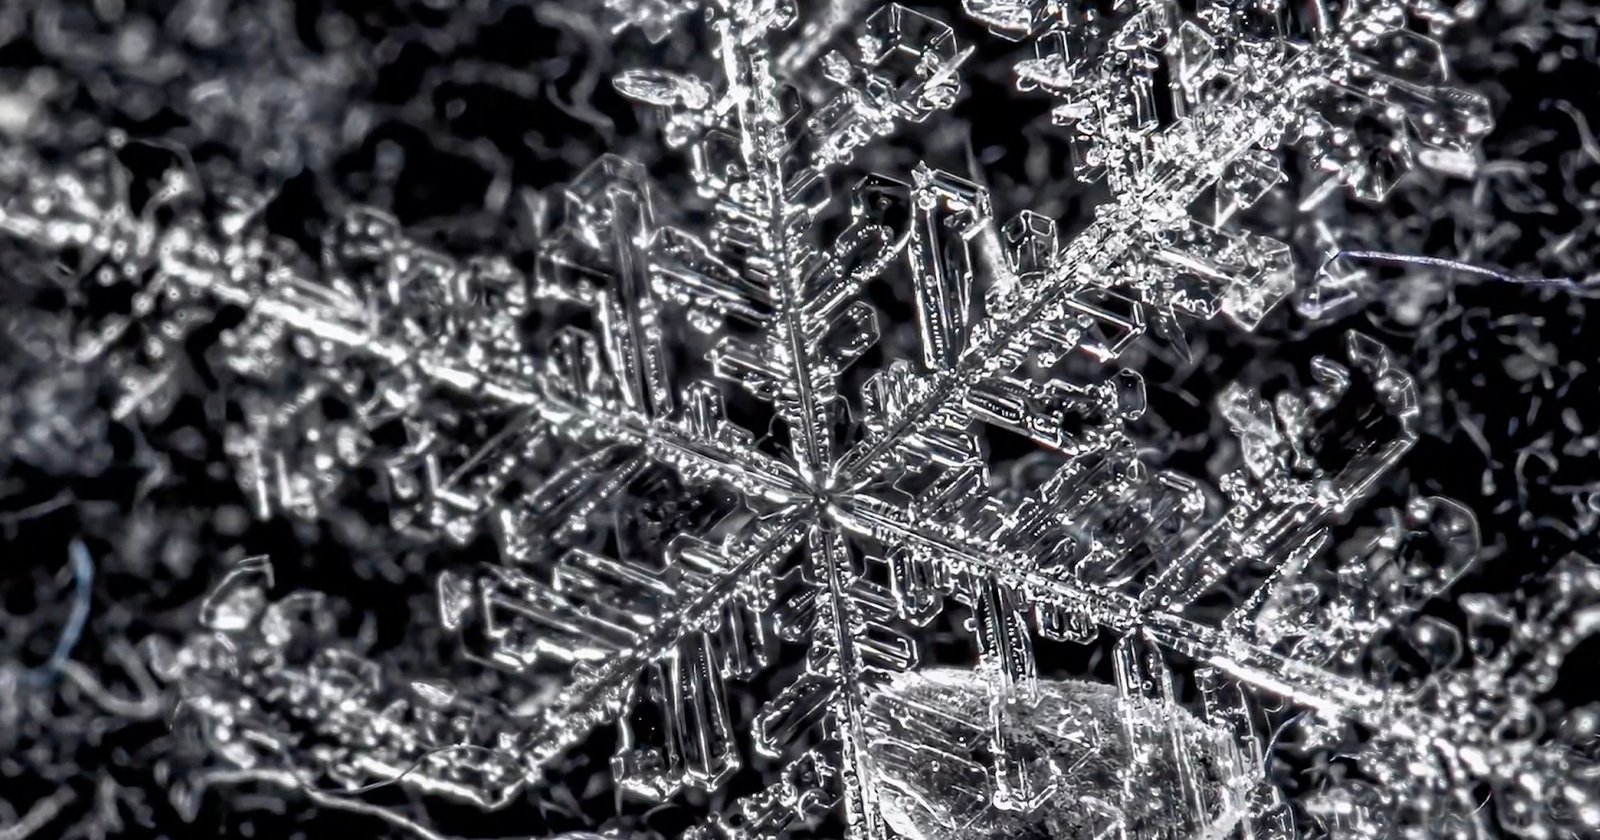
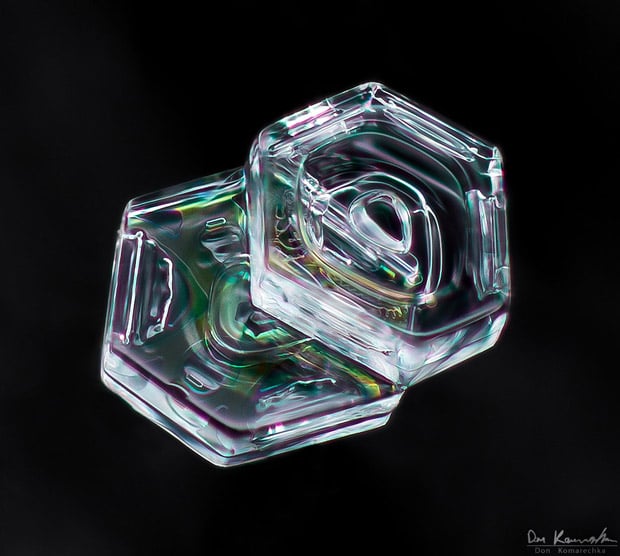
You may want to adjust the angle of your snowflake to get the best image, or separate it from a cluster of other crystals. I do this with a small flat-tipped paintbrush designed for use with oil paints. It’s gentle and doesn’t transfer heat, but snowflakes are fragile things and often break when manipulated too much (like the image above).
There are a number of reasons why I use my black mitten, it’s not just for fun. The fibers of the mitten typically allow the snowflake to have only one or two points of contact with the surface, preventing them from melting too quickly.
This background also helps isolate the subject; trying to use the top of a BBQ or other surface common to backyards will result in frustration trying to clean up the background. The mitten fibers offer enough frustrations, and in the worst cases begin like this:
And with about four hours of editing in Photoshop, turn into this:
Those four hours are not spent only on background clean-up, but on the focus-stacking process. Because each of these images are photographed on an angle, the depth of field is very shallow. No amount of stopping down your aperture will help you, and in fact it will hinder the clarity of your image.
The manual for the MP-E 65mm lens I use has an aperture conversion chart, which allows me to calculate the “effective aperture at given settings and magnifications. For example, setting the lens to a 5:1 magnification and f/16 will result in an aperture of f/96. At that aperture, diffraction limiting plays a huge role in giving you a blurry image, and your snowflake still wouldn’t be in focus from front to back.
My solution is to slowly move the camera forward and backward through the focus of the snowflake, firing off as many images as possible. I may take up to 200 images of the same crystal, and then choose between 30-40 of them to combine together. Because I’m shooting hand-held, the frames I need are often unevenly spaced and out of order.
Each image is done entirely hand-held. No tripods or focusing rails are used in any of my images. I’m often asked why, and the answer is: necessity. If I took the time to line the subject up perfectly on a tripod, the snowflake will have either melted, blown away or be smothered by other falling snow.
Photoshop is used to align and combine the focus on the various images, but the process is not entirely automatic and takes time to get perfect. There are a number of resources here that I’ve put together to detail the process.
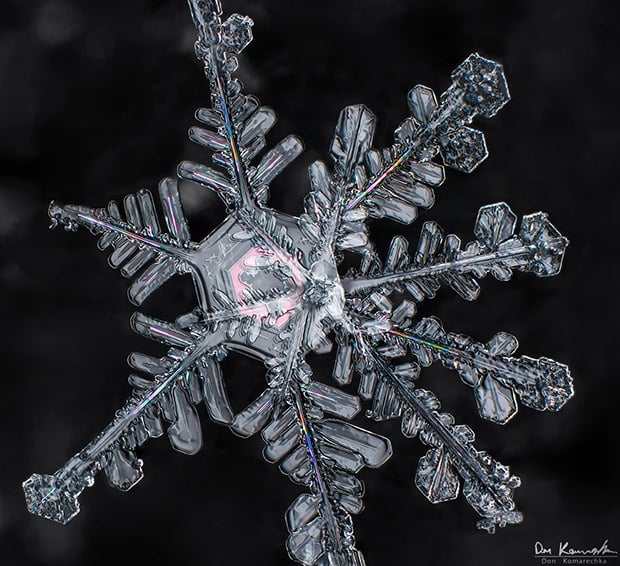
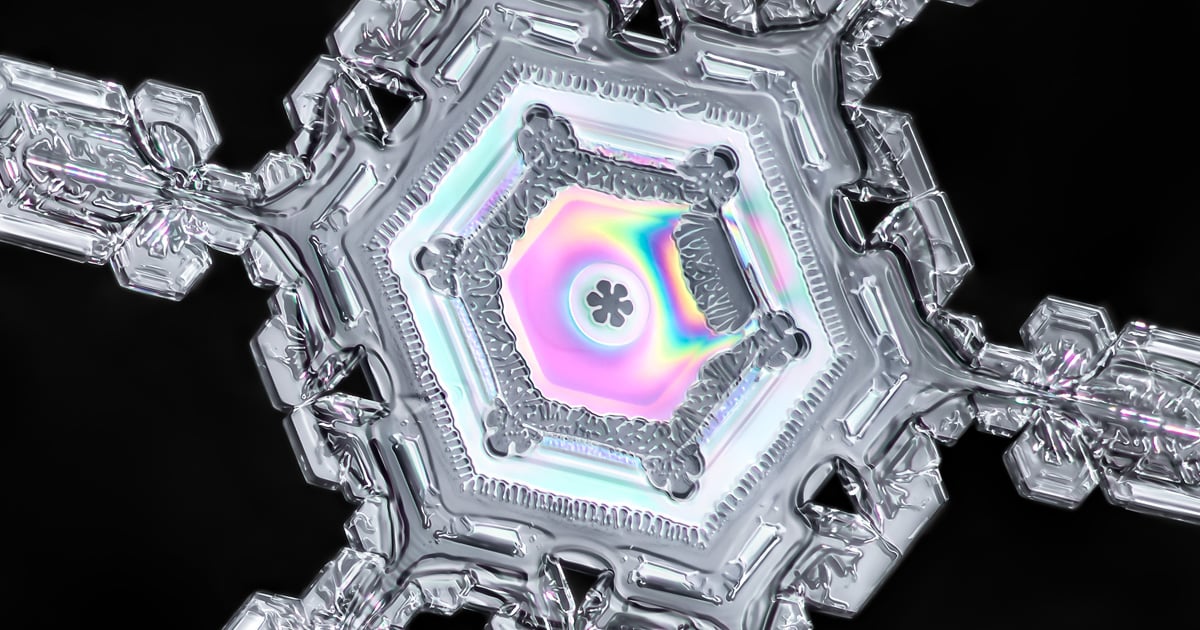
The end result is a snowflake perfectly in focus with a clean background and tons of amazing features. The color in these crystals is often an unexpected surprise, and caused by optical interference generated by multiple layers of air and ice.
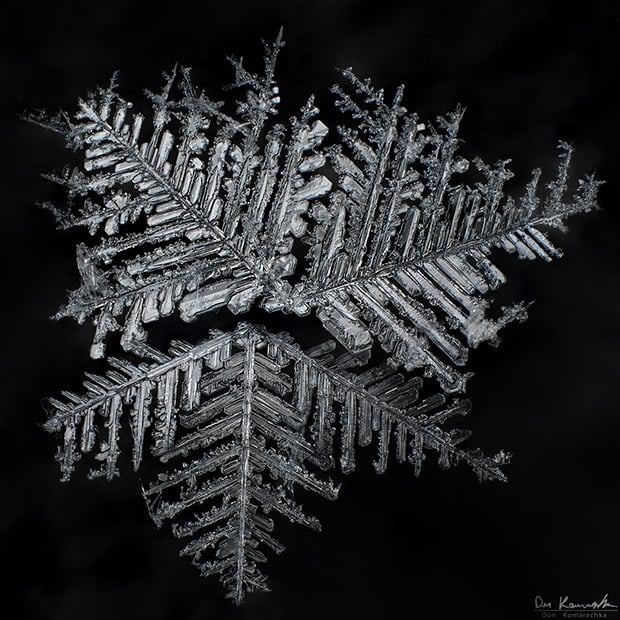
Occasionally the images are photographed in sections, turning the resulting image into a focus-stacked panorama of even greater resolution. To zoom in and examine the details, check out the image below and treat it like a Google Map – navigate around and find examples of multiple layers of ice, extra crystals attached, and optical interference colors.
All of the photography, science and philosophy of hundreds of snowflakes will be included in my book Sky Crystals: Unraveling the Mysteries of Snowflakes. The book needs your help to get funded, and a $35 contribution will get you a copy when it’s published later this year of the funding is successful. There are extra perks for higher contributions, so if you enjoy these images and the process to create them, check out the project here.
About the author: Don Komarechka is a nature, landscape & macro photographer based in Barrie, Canada. Visit his website here.