What Pancake Lenses Look Like On the Inside

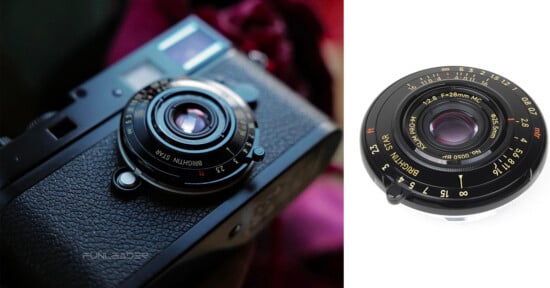
I’ve always been fascinated by pancake lenses. It just amazes me that something that small can actually function. As I mentioned in an earlier post, we’ve been taking things apart to determine where and how (and sometimes if) the lenses can be adjusted optically. So, I decided to do two pancake lenses for mirrorless cameras side-by-side to see how they differed (the Sony 16mm f/2.8 E mount and the Olympus 17mm f/2.8 micro 4/3 mount). I wasn’t sure there would be much we could do with pancakes (and there wasn’t), but I still found the look inside rather interesting.
Optically I expected both lenses to be fairly simple: the Sony has 5 single elements, the Olympus 6 elements in 4 groups, and both have the diaphragm about in the center of the lens elements. They seem very similar as we start opening up the backs: both have 3 screws holding in a light baffle / protection cap, and 4 screws holding on the lens mount, just like most other lenses.

There are a couple of minor differences: the Olympus only uses 1 small screw to hold its electronic connector to the mount, while the Sony uses two. It’s at this point that we found the first (and apparently only) optical adjustments. The Olympus uses washer type shims, while the Sony uses some 90 degree shims (black and white things in the picture) to space the lens-to-lensmount interface.
Removing the PC boards is more of the same, again Sony uses 3 screws (I have no idea why, no one else does) to hold the board in place, while the Olympus goes with the more common single screw.

Olympus Disassembly
At this point, disassembly of the two lenses gets a bit different. It’s obvious in the above picture that the Olympus has several screws holding the optical assembly in the case. Take those out and slip the case off…

Then turn it over, pop off the plastic front makeup ring, remove the couple of screws revealed under the makeup ring…

…and the rest of the front rings come off, leaving the core of the lens completely uncovered.

Two screws remove the focusing motor. The aperture control motor slips out and its flex disconnects, and now the optical elements are separated from most of the lens. The Olympus design places the optical elements in the center of a 3-armed plastic piece that connects the lens ring.

The entire optical assembly slides back and forth on three arms within the outer ring for focusing. With a prime lens this small there’s no need for a separate focusing element.
The plastic mount for the lens core had a couple of lensmaker’s marks on it. I had hoped, as is often the case, they would be associated with adjusting shims or collars, but I certainly couldn’t find any. Whether the marks are some directions for orienting this assembly, somebody’s signature, or random graffiti I don’t know. Maybe one of you can tell me?

Sony Disassembly
Sony disassembly was initially less obvious. After the PC board was removed I had expected the front plastic makeup ring to pop off, like most do, but it wasn’t budging. Re-examination didn’t reveal any other way in so I tried popping the front makeup ring a little harder. This sort of worked, although it ruined the makeup ring. It turns out Sony holds it down with a ton of glue, rather than plastic pop-tabs like most lenses. Oh, well, next time I’ll know to use glue remover. But once the ring was removed the barrel pieces slip right off the lens.

The lens core lifts out of the bottom case and has three screws begging to be removed…

…which lets us remove the inner optical core from the surrounding support.

Once past the front makeup ring, the Sony disassembly was quick and easy.
Separating the optical elements
Having removed all the lens parts except the optics, the two lenses look rather different: the Sony has a small, self contained optical assembly while the Olympus assembly is mounted to three arms that slide up and down through an outer ring.

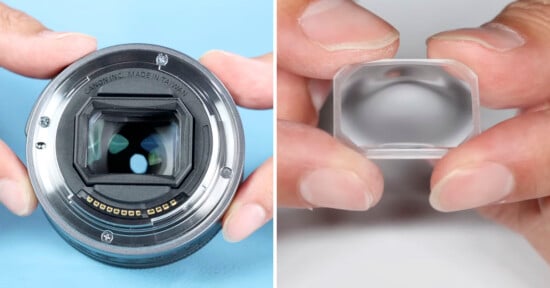
The optical groups of both lenses, however, can be separated into front and rear components by removing a couple of screws. With the Sony lens removing the screws visible in the photo above allows the diaphragm assembly comes out as a separate piece (left side of each image below), sandwiched between the front (upper image) and rear (lower image) glass elements of the lens.

With the Olympus, removing the screws allows most of the optics to detach in a group, with only one element remaining in the center of the plastic arms.

I had expected to see a shim or adjustment here, but there wasn’t one. Nor was there one in the Sony. So as best I can determine, both of these pancake lenses have no real optical adjustments other than shims at the lens mount. But then, pancakes aren’t generally expected to be razor sharp lenses.
The remaining optical section of the Olympus (left side in above image) separates neatly in two halves at the aperture. Unlike the Sony, the aperture unit isn’t self contained, but rather sits on top of the rearward group. This allowed for a nice demonstration of how aperture blades are set up (in case you haven’t seen it before). The right side image below shows the two rings of the aperture mechanism, with mounting posts on both the outer and inner rings. The aperture blades (one is sitting above the lens in the right illustration) mount to the outside post at the hole in one end, and the slot fits over the post on the inner ring. As the inner ring is turned in relation to the outer ring, the post moves along the slots, closing or opening the aperture.

The final pictures
Of course, I have to post the images of the disassembled lenses, first the Olympus and then the Sony:


These are the smallest and simplest lenses I’ve ever taken apart. The front element of a 70-200 f/2.8 lens is larger and heavier than either of these. The small size of the glass elements is really shocking: even the rear element of, say, a 50mm f/1.4 lens contains more glass than all the elements in either of these. Despite the fact it has to cover a larger sensor, the elements in the Sony lens aren’t obviously larger than those in the Olympus.
The simplicity of the design shows why these lenses rarely break. And since optical adjustment isn’t an option, apparently, there won’t be a lot of reason for me to do this again. Which is too bad, really. It’s a nice, straightforward disassembly, with a simple internal design.
And before someone asks: yes, I can put them back together.
But the Sony lens will have to wait until I get a new makeup ring.
About the author: Roger Cicala is the founder of LensRentals. This article was originally published here.