Use Bicubic Sharper for Web Resizing


We posted a while back on how to sharpen your photos like Flickr for smaller resolution images. The technique used “Unsharp Mask”, but today we’ll quickly describe how you can ensure sharpness using a simple setting.

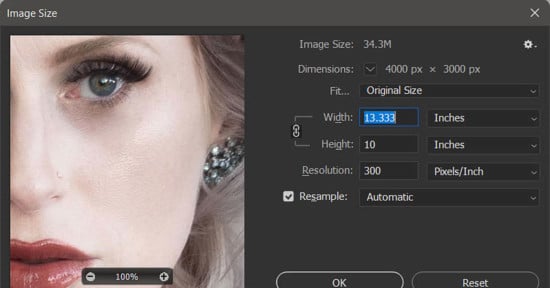
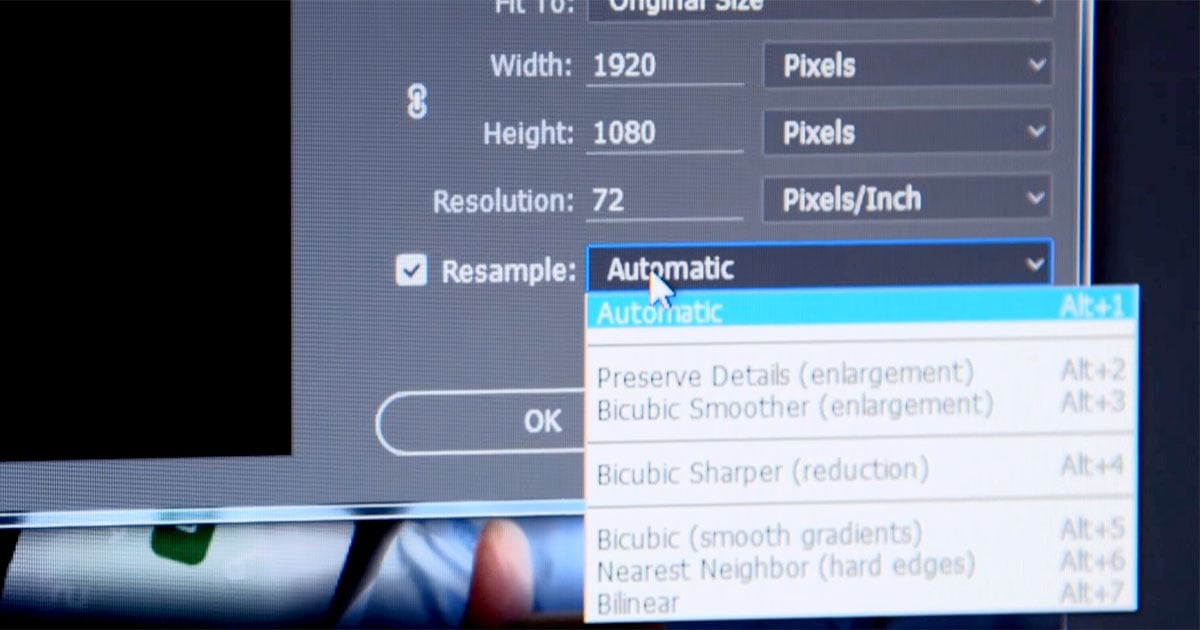
When you reduce the size of an image in Photoshop, there’s an option on the Image Size screen that allows you to choose how the image is resampled (shown above). By default, this is set to “Bicubic”, but that’s not optimal for shrinking photographs down to smaller sizes for the web. Instead, you should use “Bicubic Sharper” to preserve the sharpness in your photo.

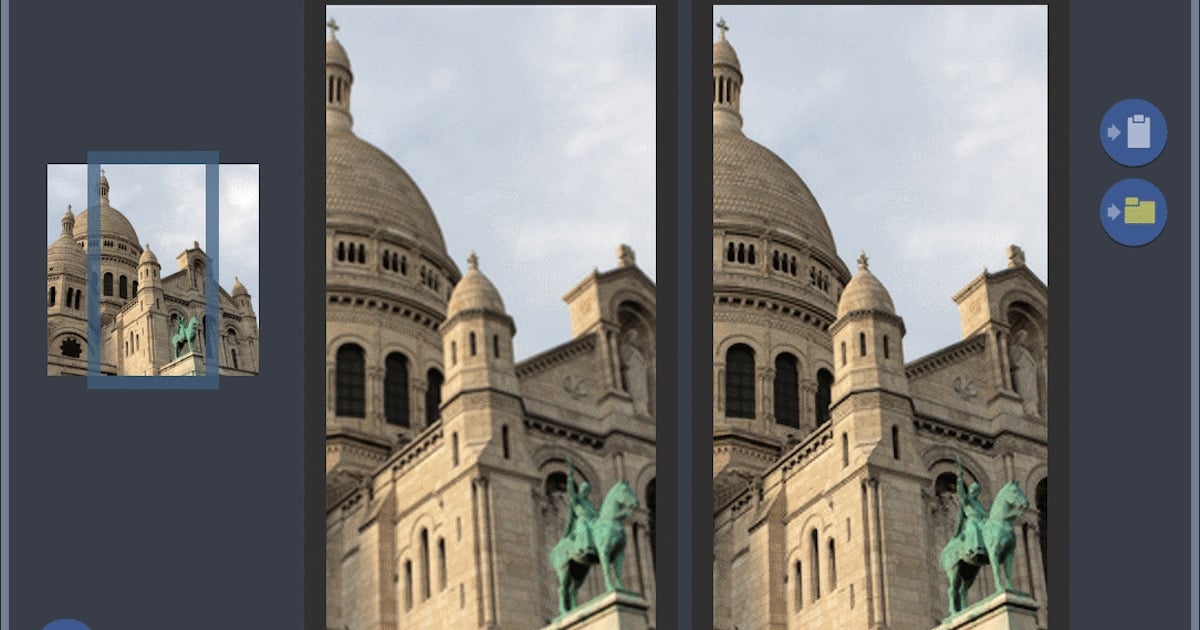
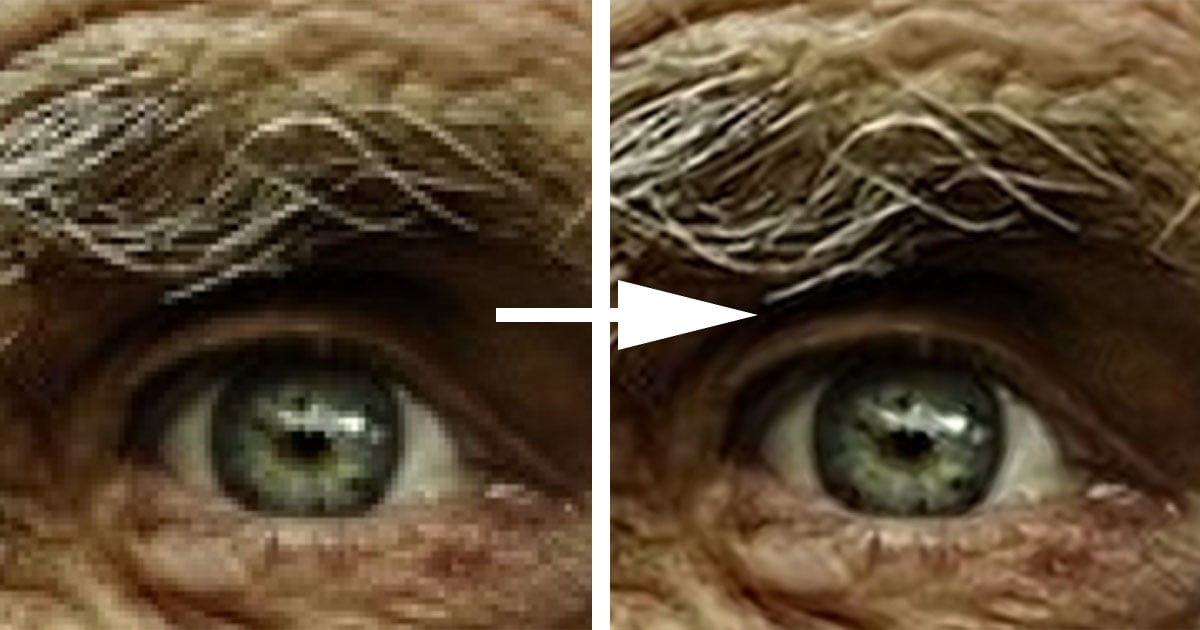
Here’s a demonstration of the difference. The following photograph was resized from 3883px wide down to 500px using “Bicubic”:

Now compare that photograph with the following version, which we resized using “Bicubic Sharper”:

You can hover your mouse over either photograph to compare it the other (you might have to wait a few seconds to see the change).

To set “bicubic sharper” as your default, go to

Preferences->General->Image Interpoation->Bicubic Sharper (best for reduction)

If you’ve been resizing images poorly in the past, you should now see a noticeable increase in sharpness! Yay!


View Comments

  1. tobi says:

    Is this Syracuse University?

  2. Nope, UC Berkeley.

  3. brian says:

    to be honest… looks a bit over sharpened to me.. but I know it's a matter of personal taste

  4. Herr Olsen says:

    This is way too oversharpened. As soon as you see that much halos you're doing it wrong.

  5. I think the “oversharpening” was due to the post-processing of the photograph rather than the method outlined in this tip though. Mainly I was trying to show the difference between Bicubic and Bicubic Sharper. Thanks for the feedback!

  6. mnovaes says:

    Not a great post, seriously. There are many better solutions for this. Lightroom sharpening is great (and as much as automatic/simple), as it is the awesome Smart Sharpen filter from Photoshop. Even the old Unsharp Mask works better than this…

  7. mnovaes says:

    Sorry if I've been a bit too harsh, but IMO there are plenty of better alternatives, in a lot of ways. Best regards!

  8. Miles says:

    You should always control sharpness and apply it as the last step in any image export. Never sharpen originals. Control over sharpening means duplicating the base layer and applying it selectively using a layer mask. Applying sharpening to OOF areas can make them look ugly (Flickr does this) and subtle differences in focus that add depth to an image are wiped out by universal sharpening (as in the image in the linked “sharpening photos like Flickr” post). There are some instances where you might wish sharpness across an image but it's worth thinking before you apply sharpness, even with deep focus landscapes there are areas that can be spoiled by sharpening, for example sharpening areas of blue sky, or any other flat colour or gradient area, can increase noise and add artifacts.

    I guess I'm just trying to say that sharpening should only rarely be just whacked on a whole image.

  9. nathanyan says:

    Tools like unsharp mask already take care of this. That is what the “threshold” parameter does.

  10. Miles says:

    Supposedly yes but in practice I've never found it satisfactory. OOF areas often have fine detail, especially in bokeh and highlights, and if an image has grain in open areas unsharp mask can turn it into artifacts. Applying sharpening selectively through a masked layer takes a minute and provides far more consist and intuitive results, at least for me, mileage may vary.

  11. [...] Very basic edits on this one with a slight vignette thrown in to frame the image a little. No cropping or rotating at all this time, man, that feels good! The biggest change I have made recently to my photo editing process is explained in this post. [...]

  12. oversharpening sometimes can be acceptable, sometimes not, mostly depends on the subject

  13. [...] Michael Zhang: Use Bicubic Sharpener for web resizing [...]

Leave a Reply

blog comments powered by Disqus