Adding a Subtle Vignette with Photoshop

Adding a vignette to a photograph can add depth to the composition and draw attention to interesting details.
However, a cautionary word: overdoing post-processing and editing techniques like vignetting can be at best distasteful. At worst, it might seem to over-compensate for what might simply be an otherwise uninteresting photograph.
Generally, the less editing needed on a photograph, the better the photograph. And naturally, the better the photograph, the better the photographer.
The same idea can apply to using vignettes: less is more.
Most editing programs like Photoshop and Adobe Camera Raw have a setting that adds vignettes, but I prefer the freedom of selecting my own areas and levels to add the effect.
Here’s a quick how-to guide on manually making a subtle vignette in Adobe Photoshop to complement an image:
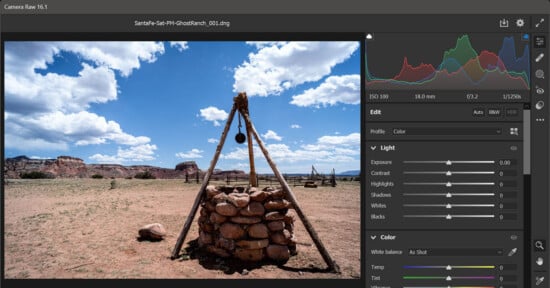
1. Use the marquee tool to select the part of the image that you want to emphasize.
The default shortcut key: ‘M’*
*Windows shortcuts denoted in (parenthesis) when different

Depending on the area you want to emphasize, you may want to use a shaped marquee.
In this example, I’m using a rectangular marquee because the photo has a lot of horizontal lines and I want to focus on the farmers in the general center of the photograph.
2. Select Inverse.
Default shortcut key: Command (Ctl) + Shift + I

Now, the area to be edited is selected.
3. Feather generously.
Default shortcut key: Option (Alt) + Command (Ctl) + D
Note: If you’re using a Mac, you may need to turn off the default keystroke shortcut for toggling the Dock; the shortcut is the same.
 The Feather Radius depends on the size of the original paragraph, but for most photos, it’s best to feather generously, above 60 pixels.
Note: In Photoshop CS4, the option will be listed as “Refine Edge” or a feathering option will show up on the menu bar while using the select tool. CS4’s Refine Edge mode is useful because it shows how much of the image will be selected when feathered.

By feathering, the selection will be rounded and blended more naturally with the rest of the photograph. The larger number radius, the more blended the feathered area becomes.
4. Create a new layer for levels and adjust the midtones.
 It’s usually a good idea to create a new layer for each type of adjustment. Once they’ve been made, they can be toggled back and forth to compare the original to the adjustments made.
To create a new adjustment layer, click the half-shaded semi-circle at the bottom of the layers window.
The layer will only affect the currently selected area.
Move the mid-tones slider towards the whites to darken the mid-tones to the desired effect. Toggle the preview button to compare.

5. Hide the marquee to see the vignetted area.
Default shortcut key: Command (Ctl) + H

By hiding the marquee, the overall photograph is more visible and the effects of the adjustment are more apparent.
Continue to adjust the mid-tones to the desired darkness. In this case, I’ve only moved it from the normal 1.00 to 0.73 for a subtle, yet clearly present vignette effect.
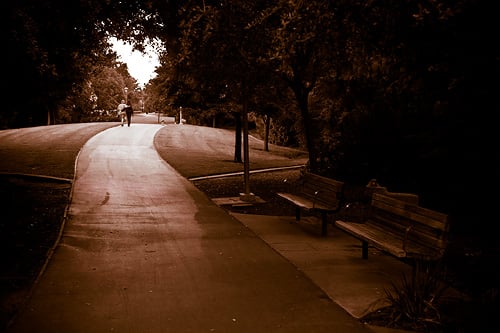
The Final Product:
Mouseover to compare to the original.
Another example of vignette editing, with the marquee drawn closer to the subject: